You have many options when searching for a handyman Sarasota FL. Here are the best companies: Paul, Handy Brit and Handy Brit. If you are looking for a quality handyman service, The Handy Brit is the best option. You can also check out their reviews to learn more about what they offer. However, how do you know if they are the right company?
Handy Brit
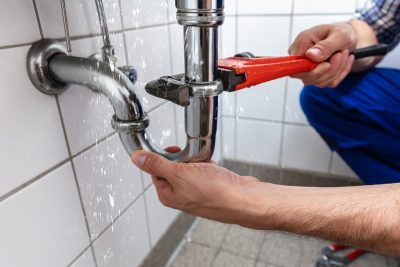
The Handy Brit, a handyman from Sarasota in Florida, is called the Handy Brit. They provide home improvements, general repairs, as well as home automation services. Their number one goal, client satisfaction, is their number 1 priority. The Handy Brit is available by email, telephone, or online. To learn more about their services, read their reviews on Google and Yelp. Additionally, you can request an online estimate to see the savings you could make on your job.

THE HANDY BRIT is the place to go if you need a reliable handyman Sarasota. They provide professional services with knowledgeable, friendly staff. You can trust that your work is in safe hands as they are licensed and bonded. They'll even work on holidays, too! You won't find another handyman in Sarasota providing such exceptional services for such affordable prices.
Paul
PAULS PRECISION HANDYMAN is a good choice if you are looking for a handyman near Sarasota. He is a professional handyman in the holiday, FL, area. His rates can be affordable and he is well-respected by his customers. No matter the size or complexity of your project, he can come to you and complete it at your place. Read his reviews and you will be able to choose the right handyman for your home or business project.
Prices
The cost of handyman services in Sarasota ranges from $180-$650 depending on the job's complexity and size. Depending on the size of the job and its complexity, many handymen charge an hourly rate. Some charge flat fees. For small jobs like changing a light bulb, hourly rates work well. For larger jobs, though, you may need to spend several days and require special equipment. You can also get a fixed rate for hanging ceiling fans or lighting fixtures.
Handymen can perform many services such as installing an awning or upgrading a garbage disposal. While prices vary, the average price is between $165 and $615. Handymen in Sarasota can perform most basic home repairs. You may need to pay more for larger jobs. Do your research before hiring a handyman.
FAQ
What are the most common hourly rates for handymen?
Handyman fees range from $50 to $75 per hour. This is a job that most of them have done for years. They spend around 10 hours on average working for any given job. They don't need to advertise; they are well known in the neighborhood.
They have a tendency to be specialized and develop customer relationships over time.
The main difference between them, other contractors, is that they are fast, reliable, cheap, and efficient.
The majority of people have at least 2 or 3 friends who they trust enough that they call them when they need assistance.
Some people have their own business.
Are handymen insured?
Yes! Yes. Most insurance companies will cover liability claims for bodily injury and accidental property damage up to $1,000,000. This means that you will be compensated by your insurance company if anything goes wrong during the project.
How many hours does it normally take to complete a typical DIY project?
An average DIY project takes between two and four hours. The complexity and difficulty of the project will determine how long it takes.
Statistics
- Another estimate was that the market in the United States was $126 billion and was increasing by about 4% annually. (en.wikipedia.org)
- More than 20% of homes in America have outdoor living spaces, including decks and patios. (mrhandyman.com)
- Mila keeps a commission of 20% for each completed service performed by Friends and charges various service fees regarding work done by Pros. (appjobs.com)
- “Before the pandemic, 40% of people asked how we could estimate a job when we weren't there,” Rose recalled. (inquirer.com)
- Our handyman services for seniors are provided by professional senior helpers who have been serving the community for over 20 years with 98% customer satisfaction. (cantatahomeservices.org)
External Links
How To
How to Install a Receptacle Box
Follow the instructions of your local building inspector before installing any type electrical outlet. This includes ensuring that the wiring is installed correctly and that there are no problems associated with water damage or existing fire hazards.
For installation, most boxes come prewired with four wires coming directly from the breaker panels. The two black wires run through a box to the first screws on one side. While the red and the white wires run to the second screws on the opposite side. It is very important to make sure that you do not use wire nuts and wrap around the screws when connecting these wires together. It is likely that you will have problems getting the wires into place after tightening them down. You want to allow them to move freely, but keep them tight enough that they don't pull away from their holes.
You might want to add a receptacle to an existing box. To accomplish this task, you need to cut off the top of the existing metal box and add a new cover plate. After you have made the hole for your new receptacle, and attached the coverplate, you will need to connect all wires to your new receptacle.
If you are looking to replace the existing receptacles in your home with a more modern light switch, you may be able to accomplish this job without needing a licensed electrician to perform this work. The first step is to take the old switch out of its mounting spot. You should then disconnect all wires from the switch. These wires include the power that goes into the switch and the ones that provide electricity to the lights in your room. Once you have disconnected all of it, you can begin the replacement process.
After you remove the old switch, measure how far the wall studs are from your new switch and mark them using a permanent marker. Once this is done, you will need to determine if your new switch should be mounted higher than or lower than the floor. You will need to drill holes for the mounting bracket depending on how high the switch is to be mounted. Or you can attach it directly to the wall with drywall anchors.
Once you have the measurements taken and the locations marked, it is time to start the project. With the help of a family member or friend, you can begin to remove the drywall around where the switch will be placed. For cable safety, make sure you leave 8 inches between each of the studs. Next, you will need to install the new switch using the appropriate mounting brackets. Attach the cables to your switch and then secure it onto the mounting plates. Once the switch is fully installed, you'll need to turn back the power and test it for proper operation.